I got asked quite often on how to compost food waste at home.
I always tell them it is very easy to do. It is not a rocket science and low in cost. All you need is a pair of hands, a clear mind and heart to do it 👐 😇 💖
So let’s get started.
For context:
– I live in a landed house with small patch of green where I place my compost bin.
– I am only cooking on the weekend with food waste of not more than 2kg/day.
Step 1: Get a 20L paint bucket
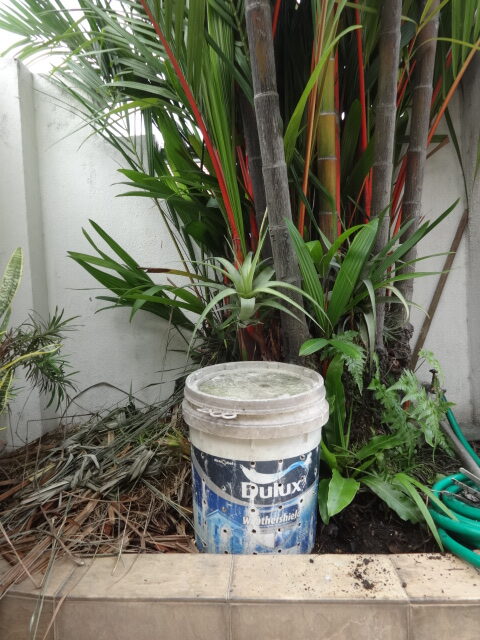
I have been using this paint bucket as compost bin for about 5 years now. It has been sitting under my lipstick palm tree with soil at the bottom.
I didn’t observe much wear and tear despite the rain and shine, except for some green mold growing on the lid due to the stagnant water and moisture.
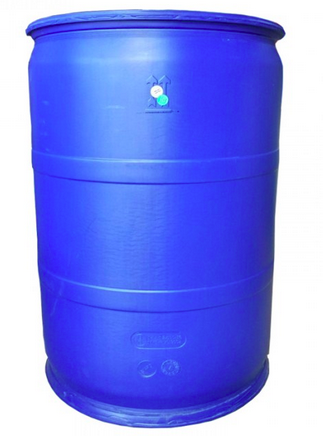
Paint bucket is easy to get and the size is just nice for the amount of food waste I have at the moment. If you have more food waste than me, you can either have more than one of these 20L bucket, or get a used water drum (available size in the market: 120L, 180L, 220L).
Step 2: Modify the paint bucket


My husband drilled holes around the body of the bucket.
The holes are useful for:
(a) Exchange of air:
- The microorganism living inside need oxygen and they exhale carbon dioxide like us too.
(b) Reduction of excess water:
- Some of our food waste is high in water content especially fruits and vegetables. So having some holes are helpful to avoid “flooding” the microbes. You will observe excess water to be seeping out from the holes occasionally.
We also cut the bottom of the bucket. This is to enable us to harvest the matured compost (black gold) at the later stage.
Keep the lid of the bucket. This is where you input your house food waste and have it closed to avoid pest and rainwater.
We first got our compost bin from Eco Knight about 10 years ago. It remains durable till now in my mom’s house as it is made of HDPE plastic. We then followed this design to make our own compost bin 😉
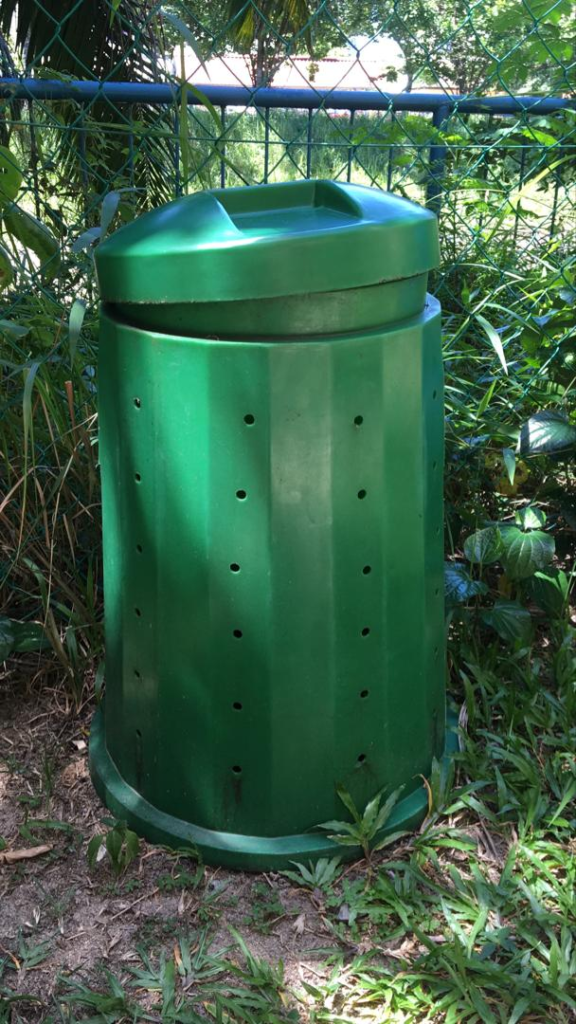
As you can see from the photo, the composting bin must be sitting on soil ground.
The moment you place a bin on the ground, you have sort of “housed” the microorganism. From that day onward, your bin is their condominium and the occupants are food waste and the ever-growing microbes.
In summary:
Holes around the body + cut bottom + keep the lid = Modified compost bin
Step 3: Put in your food waste


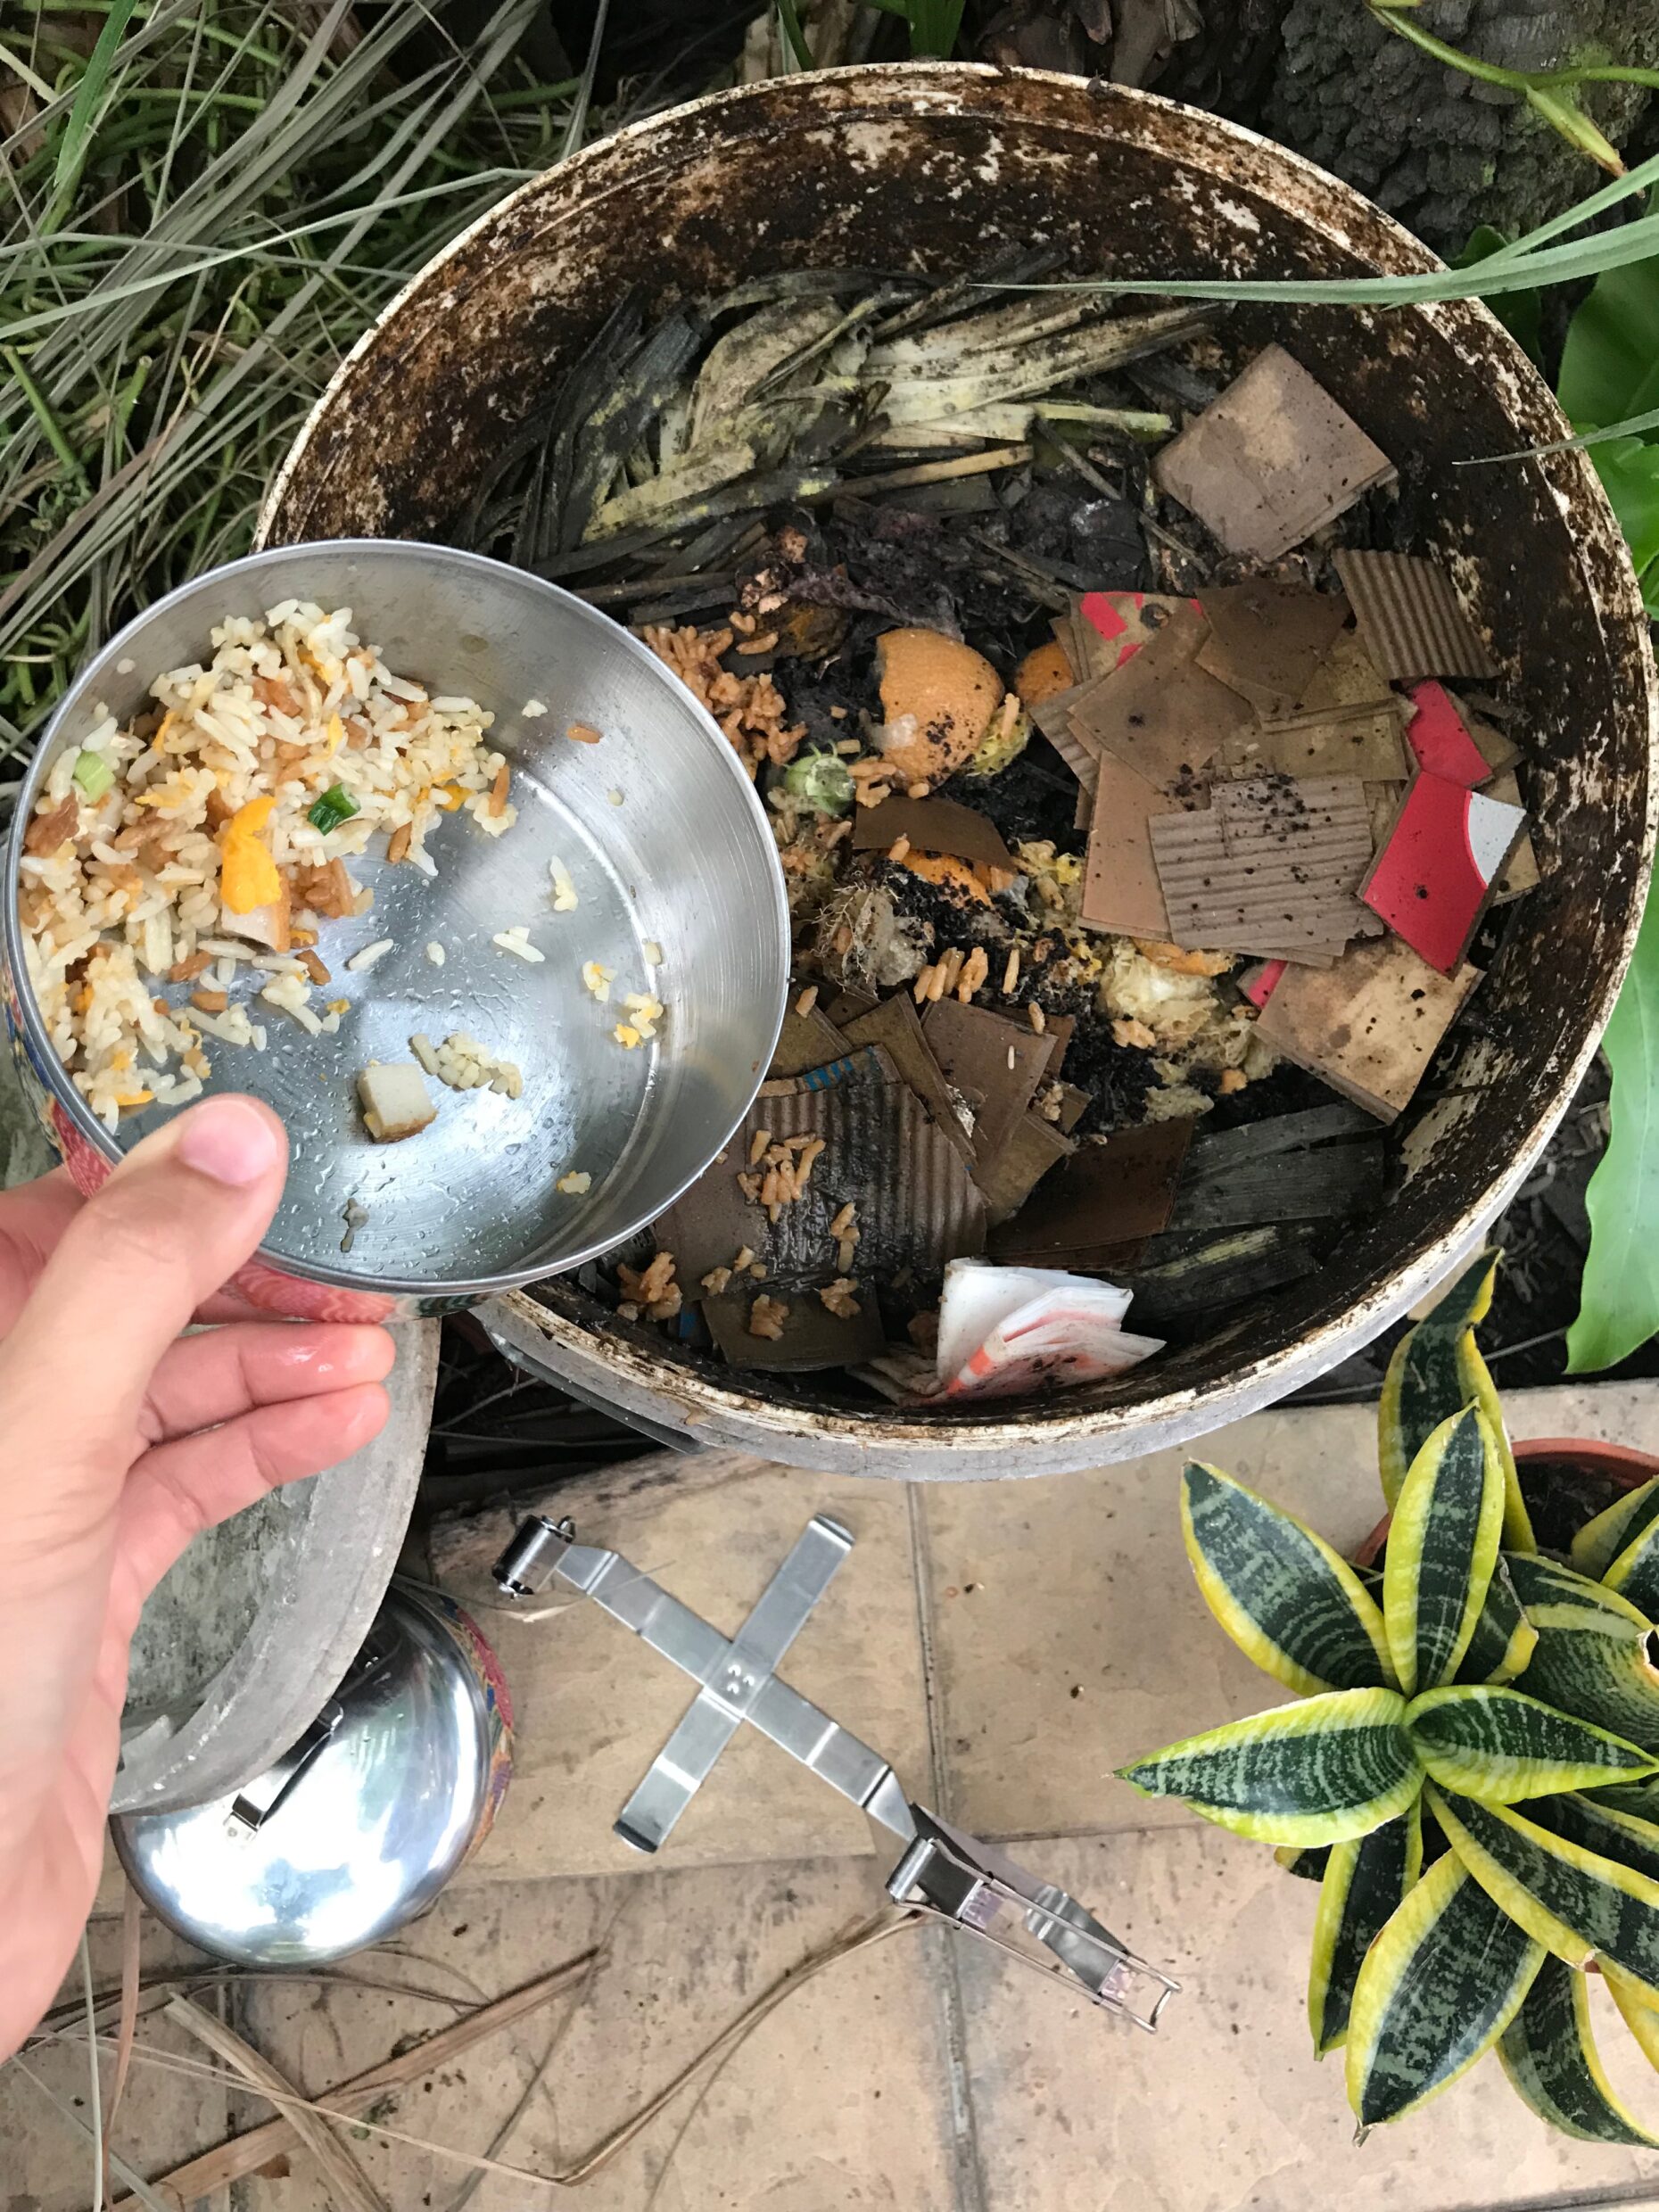
Here you can see that I have some pandan leaves, watermelon skins, lemongrass stalks, basil leaves, tomatoes and tissue paper (yes compostable :D).
Usually after putting the food waste, I like to layer with some soil and dried grass cuttings to reduce the odour and moisture (imagine wet smelly garbage odour).
Based on my past experience when I first composted food waste, I did not add any of those (a.k.a. brown material). I ended up having a mini landfill outside my house where I have a bucket full of sourish, gooey semi-decomposed food waste with large amount of maggots having party there.
And you can imagine how my mom will be complaining about my crazey idea of composting at home.
But that’s okay. We all learn from mistake.
I then realised that it is important to balance the green (nitrogen) and brown (carbon) ratio for composting to work well. A balance C:N ratio will enable microbes to be very active in their decomposition activity, thus creating high heat (up to 70 degree Celsius) that can kill other pathogens.
But we ain’t no scientist. How do we know whether we have achieve the balance? Check out Step 4.
What are brown and green material?
In composting, brown material refers to dry or woody plant material. Often, these materials are brown, which is why we call them brown material. Example of brown material are dry leaves, newspaper, cardboard, saw dust, wood chips, straws. Brown material is high in carbon content.
Green material is wet and fresh material (yet to decay). It is usually green in colour (represent freshness such as vegetables cuttings, fruit peels, rice, bread and other food scrap). Green material is high in nitrogen content.
FOOD FOR THOUGHT
(A) Can I add meat and dairy products into my compost pile?
I think you need to try it once and see the result for yourself.
For me, I have added these in the past: chicken bones, anchovies, fish bones, milk powder, yogurt and cheese. Based on my observation, it did not affect the composting activity because I always balance it with layers of soil and dry leaves and I did not add too much of them at one time. At the end of the day, I still get my black gold. After all, I really want my compost bin to ease my life instead of restricting me in terms of what can and cannot be added in.
(B) Can I keep adding food waste into existing compost pile?
Yes.
Continue adding food waste on a daily basis and some dry leaves, twigs or soil to go with it. I read that some people like to fill in food waste in one bin for a period of time (e.g. one month) and then leave the compost pile untouched for two months before harvesting the matured compost. During the two months period, they move on to another compost bin and continue Step 1 to 3 separately.
But for practically sake, I would advice anyone to just keep adding food waste into your existing pile regardless that degradation of food waste is still in process. This is because not all of us have the space and time to manage more than one compost bucket.
Step 4: Check your composting progress
There are a few indicators to look for in order to know if you have a good balance of C:N ratio. For me, I look for:
(a) Black soldier fly larvae and the odour
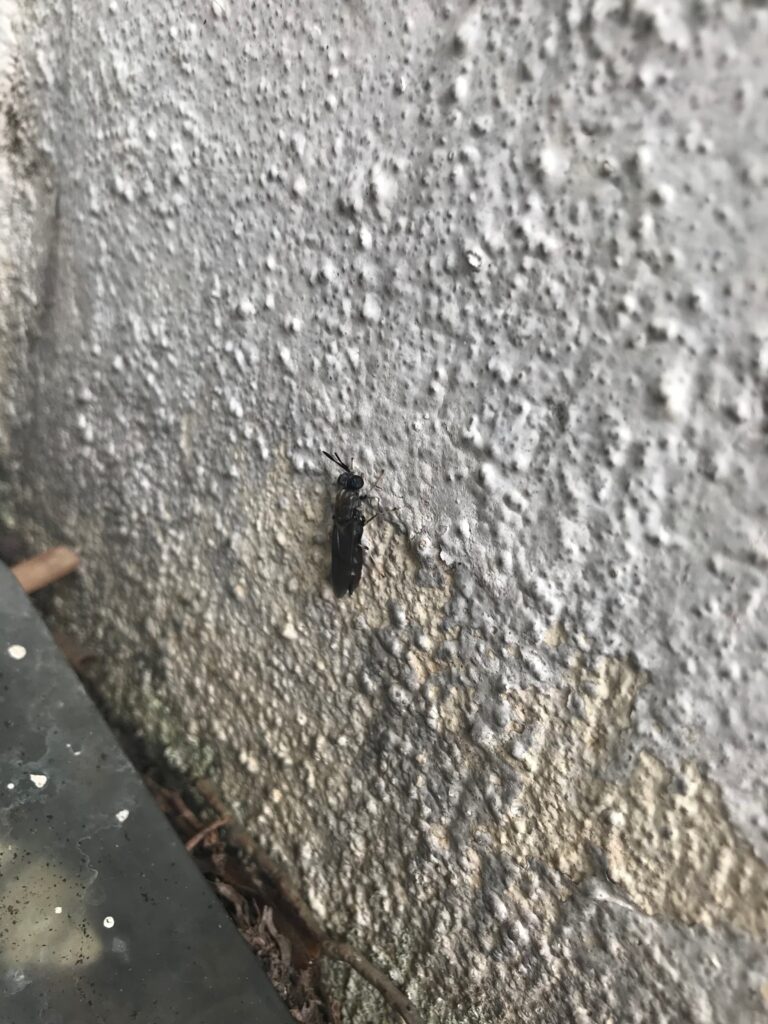
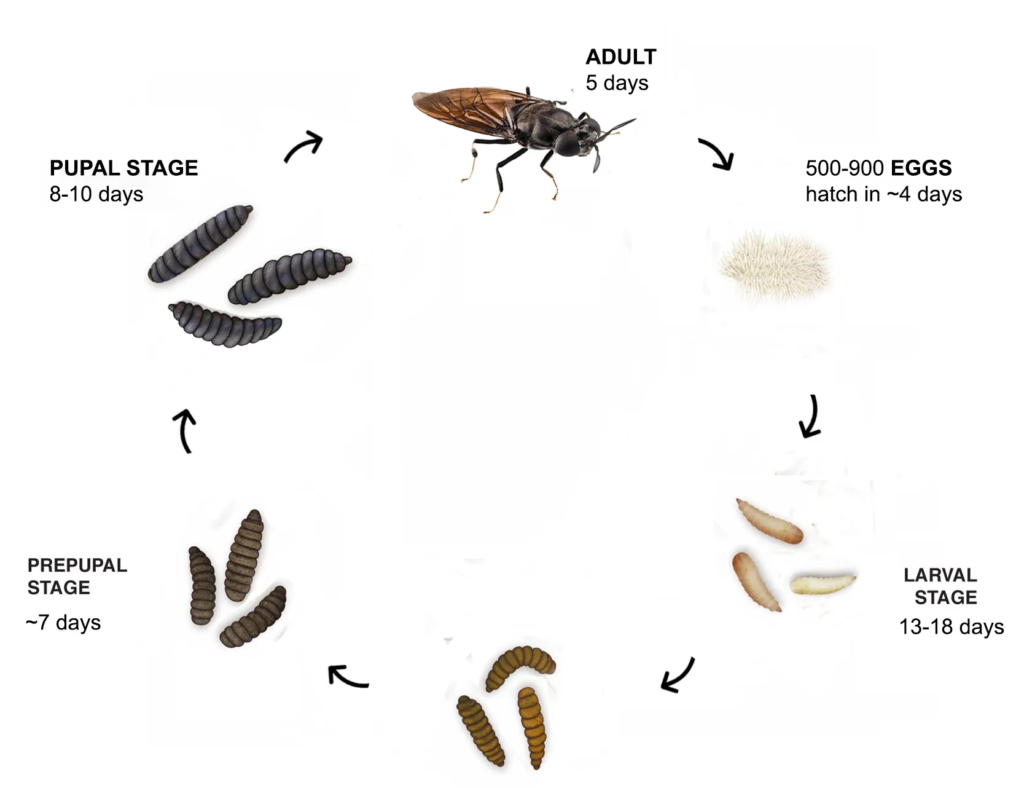
Black soldier fly (Hermetia illucens) is a common fly found in our country in which it gains popularity due to its ability to decompose food waste. Basically these flies are attracted to lay their eggs near to human food due to the available nutrients. Unlike house fly, black soldier flies are neither pests nor vectors because they do not feed on faeces. They are basically like us, Malaysians who like food a lot.
The black soldier fly larvae will consume our food waste and excrete faeces just like us. The faeces made up part of the compost (black gold) that we are going to harvest. And because the food have gone through the larva’s digestive system, it is well broken down and made it easier for our plants to absorb later. After the larvae eat enough, it will get into pupal stage (cocoon) – basically just sleep – then turn into adult flies!
If your compost pile is too wet in which you input a lot of food waste with too little drier stuff like paper or leaf, then it makes a good house for the maggots (house flies gang). When compost pile is too wet, it gives our sourish smell and that easily attracts maggots. When maggots overpopulate and dominate the compost, the black soldier fly larvae will find it difficult to survive in this environment.
(b) Check your compost; It’s time to tilt the bin!
A matured compost is black in colour, loose and fluffy texture, dry and almost odourless. If these properties are present, congratulations for your harvest of black gold!
An immature compost is brownish yellow, wet and soggy, clayish/lumpy in texture and smells sourish / acidic. That’s okay. Straighten you bin and let it sit in the “condominium” for few more weeks and come back to check again.
I get very excited when I see black gold falling down effortlessly from the bin when I tilt it. I will harvest them immediately into a pot for planting, or spread it on my vegetables or flowers as top soil.
Certain food like seeds (avocado seeds especially) and shells from nuts or eggs are harder to decompose. But that’s okay. You can always scoop them back into the compost bin for degradation to continue.
💡Another tip on whether your compost is matured enough:
If you observe yellowing of leaf, white spots or sign of wilting after putting compost on your plant, high likely your compost is not ready to be used. This is because immature compost still has nutrients that are not fully broken down by microorganisms. Putting it next to your plant means a competition between the microorganism and your plant for oxygen and other resources in order to live and carry out its daily metabolic activities.
So to summarise how you can start composting at home:
Step 1: Get a 20L bucket
Step 2: Modify the bucket
Step 3: Put in your food waste
Step 4: Check the composting progress
I hope you enjoy this article and find it useful.
If you have any other questions, feel free to ask me at shemeigreen[at]gmail.com.
Cheers and happy composting!
